Have you ever wished to record your Windows screen but been annoyed by the features that the built-in tools could not do? If you’ve attempted to use a basic tool, chances are you’ve encountered one or more of the following difficulties:
- You can’t record file menus or dropdowns
- You can only record one window at a time
- You can’t add effects or callouts
- You can’t record your audio simultaneously
- You can’t add music or background audio
It turns out that there is a better method. To help you choose the best screen recorder for your needs, we’ll walk you through the process of recording your screen on Windows 10 and 11 using a variety of apps in this article.
This includes TechSmith products like Snagit and Camtasia, which both allow you to record your screen in audio on Windows 10 and 11. So continue reading to find out how to screen record with audio on Windows!
Don’t worry if you use an Apple device; we have another piece that explains how to record your screen on a Mac, complete with audio.
Also Read : How To Take Screenshot On Windows 10 and Windows 11
How to use Game Bar to capture the screen on Windows 10 and 11
Go to Settings
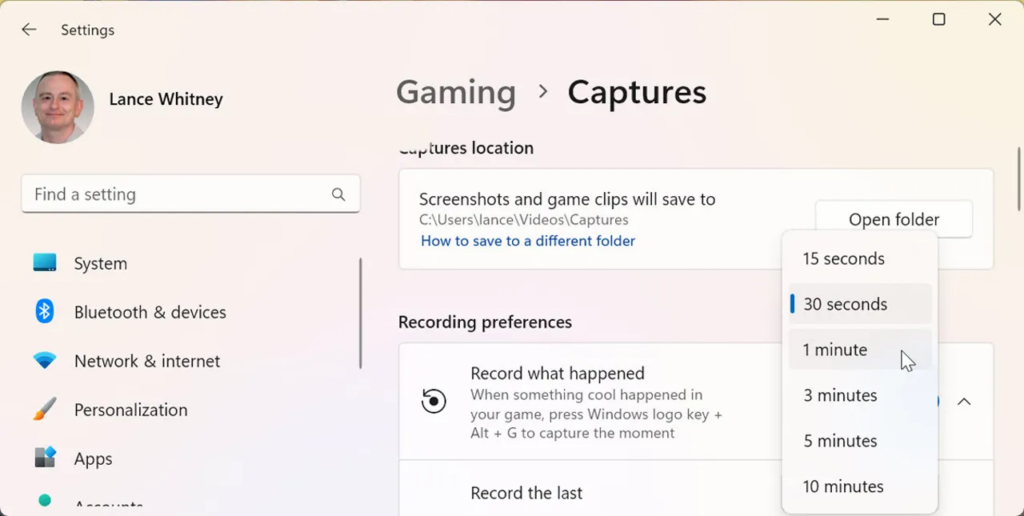
Navigate to Settings > Gaming > Captures in Windows 10 or 11. Windows 10 and Windows 11 have different screen layouts, but the settings remain the same.
You have the option to modify the location of your screen recordings, which are saved by default under Videos\Captures in your user folder. After that, you have the option to record previously completed activity.
Turn on the Record in the background feature in Windows 10 while you’re playing a game. In Windows 11, activate the Record what happened switch. After that, you can choose how long the background recording will last. To change the time from 15 seconds to 10 minutes, select Record the last from the dropdown option.
Turn on your recording settings
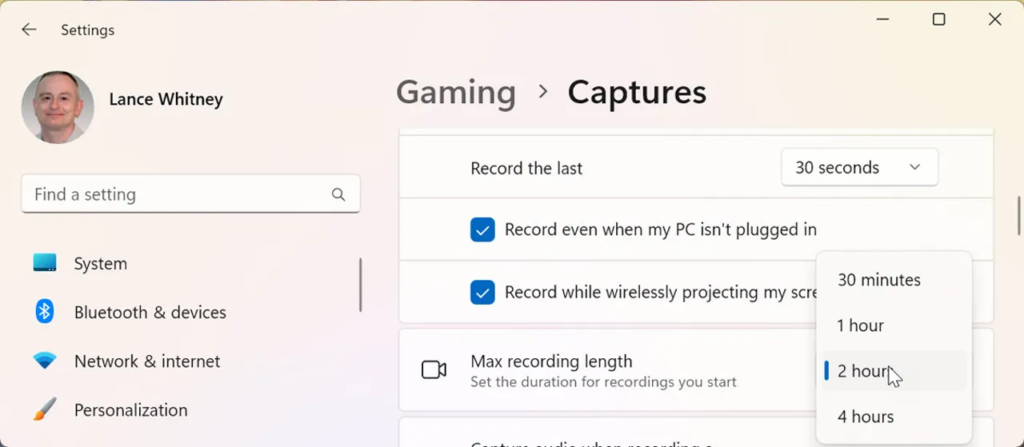
To activate both options, next select the boxes for Record even when my PC isn’t plugged in and Record while wirelessly displaying my screen.
Click the dropdown menu for Max recording length to set it to 30 minutes, 1 hour, 2 hours, or 4 hours.
Turn on audio capture and control while screen recording
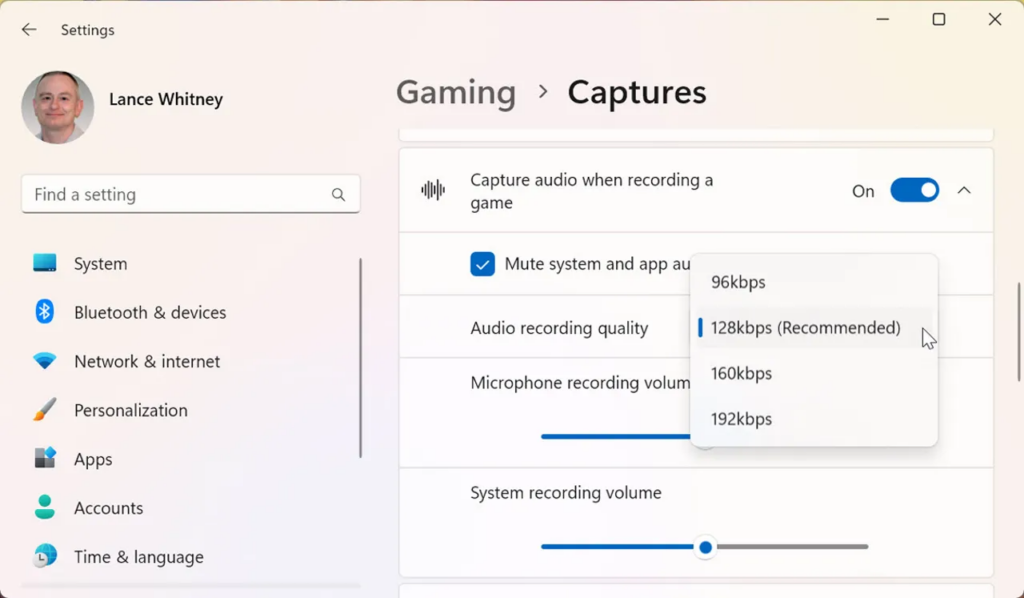
Press the Record audio or Capture audio button to begin recording audio while playing a game. Next, you have the option to adjust the audio quality, PC volume, and microphone recording volume.
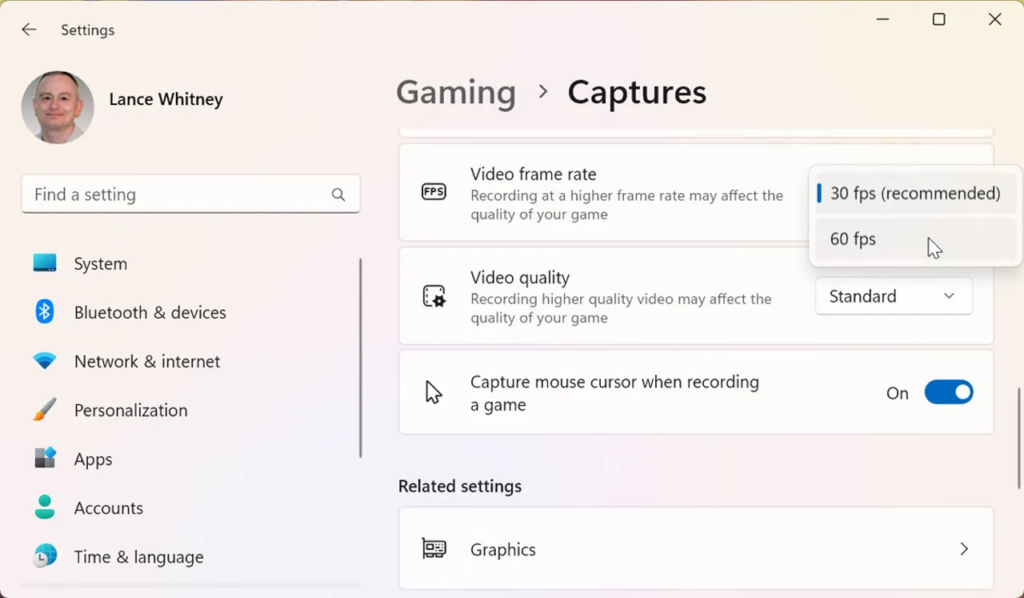
Turn off Capture mouse cursor when recording a game
Thirty frames per second is the ideal frame rate. Although 30 frames per second should be plenty for most recordings, you can increase it to 60. You have the option to adjust the regular video quality to high if needed. Lastly, if you usually don’t record the mouse cursor when you record a game, you can flip off the Capture mouse cursor switch.
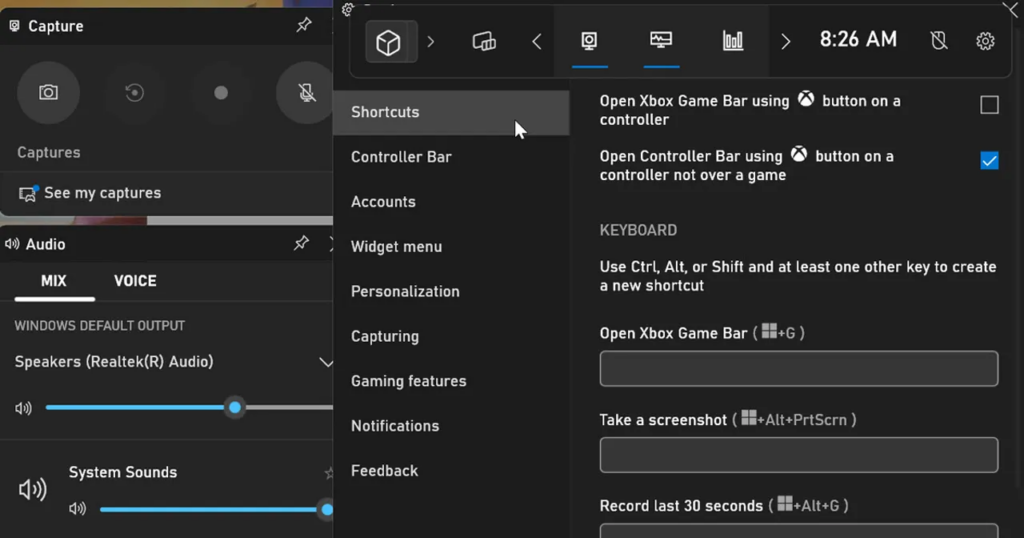
Control keyboard shortcuts
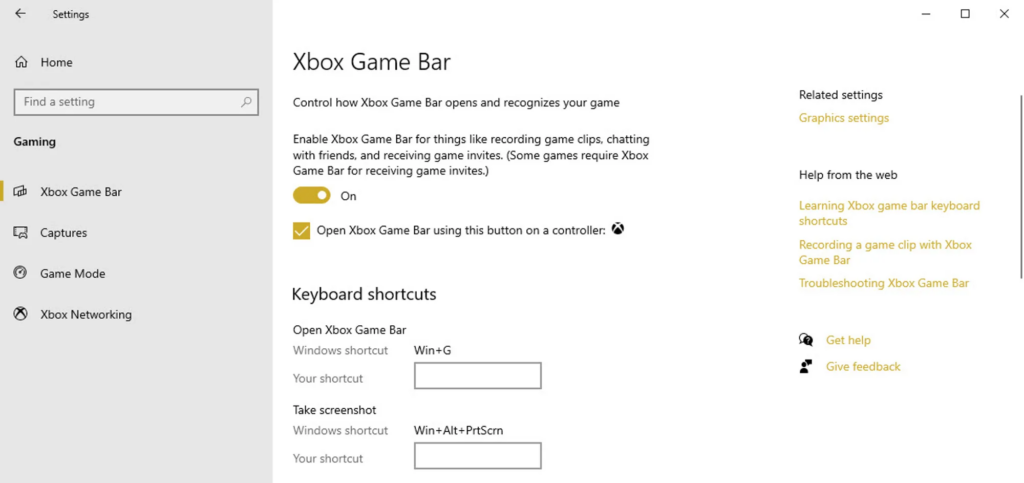
There are numerous keyboard shortcuts that can be used to operate Xbox Game Bar. In Windows 10, the Settings screen’s shortcuts can be viewed and even modified. Navigate to Settings > Gaming > Xbox Game Bar to do this.
In Windows 11, you have to open the Game Bar interface to view and modify the shortcuts. The following shortcuts are ones you’ll want to keep in mind:
- Windows key+G: Open Xbox Game Bar.
- Windows key+Alt+R: Start or stop recording.
- Windows key+ Alt+G: Record the last 30 seconds of screen activity.
- Windows key+Alt+B: Turn HDR on or off.
- Windows key+Alt+PrtScn: Take a static screenshot of your screen activity.
How to run the Game Bar
Set up the activity you want to record
There are numerous keyboard shortcuts that can be used to operate Xbox Game Bar. In Windows 10, the Settings screen’s shortcuts can be viewed and even modified. Navigate to Settings > Gaming > Xbox Game Bar to do this.
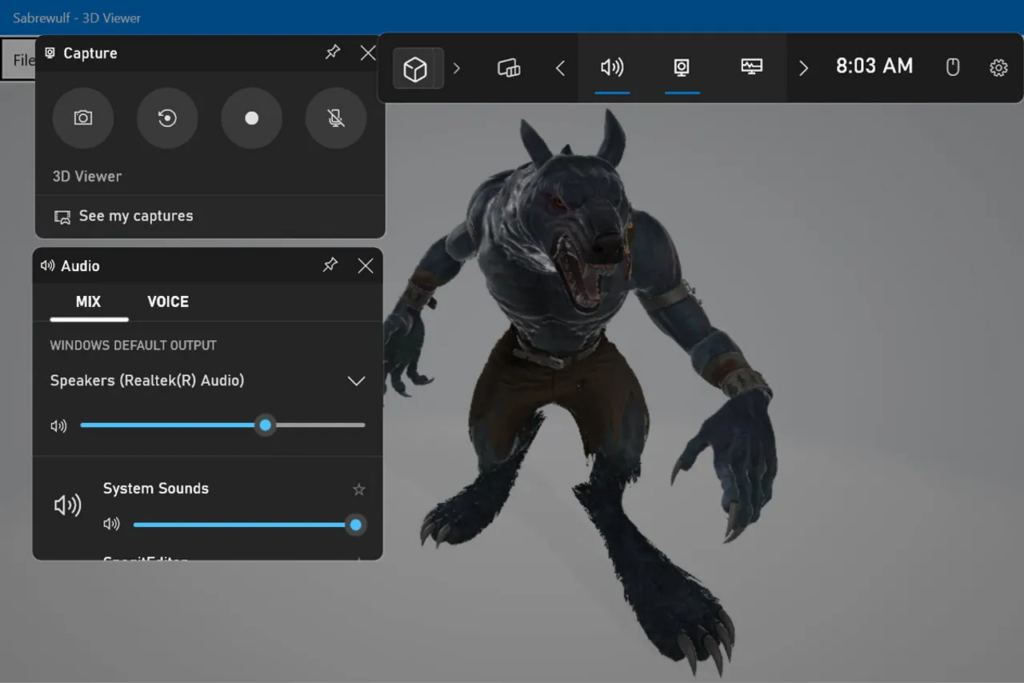
The top toolbar lets you show or hide the different menus and panes for Game Bar, including Widget, Audio, Capture, Performance, Resources, and Xbox Social. At a minimum, you’ll want to see the Capture pane so you can start, control, and stop the capture.
Start a recording
Tap the Record button in the Capture pane. Then perform the screen activity you want to capture. A small recording panel appears on the screen.
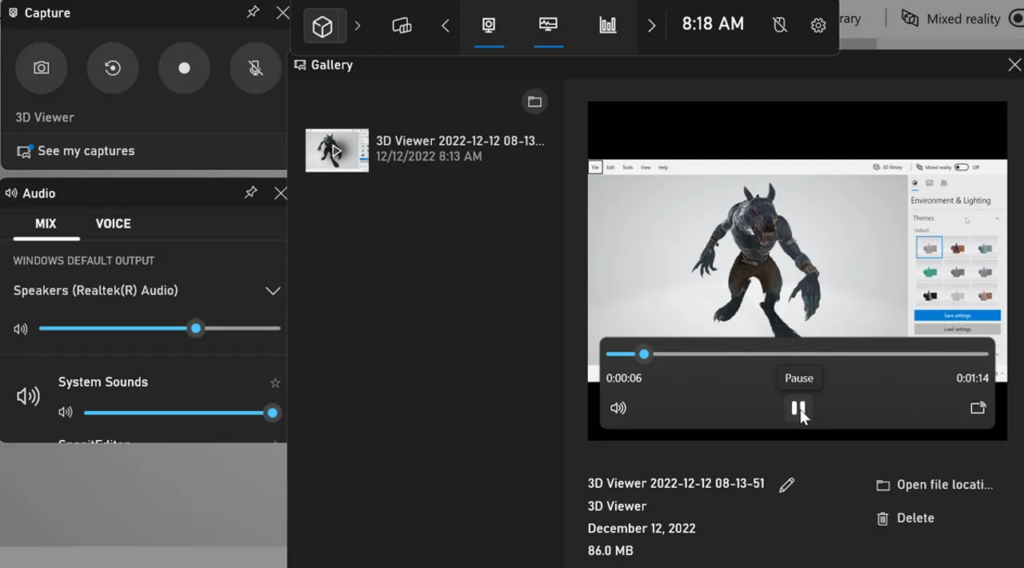
Stop and view your recording
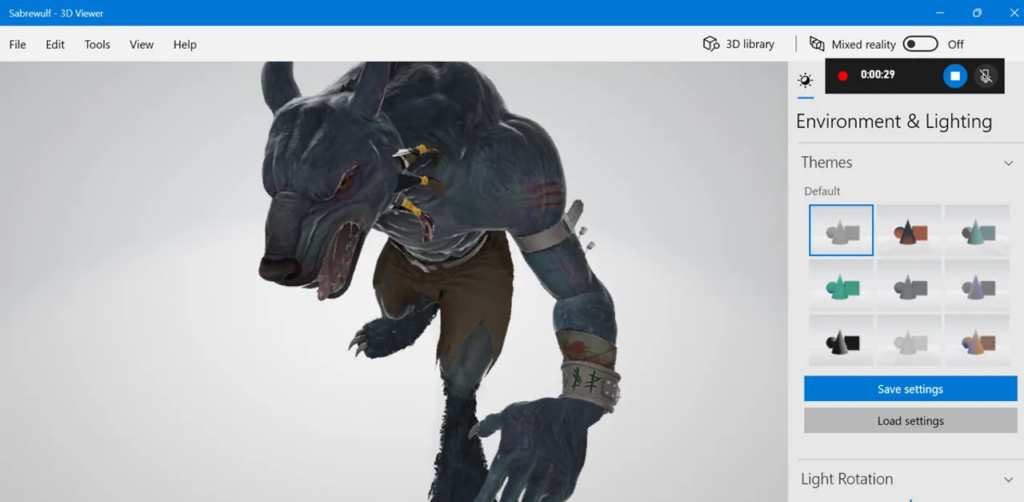
To end the recording after the action you’re capturing is finished, click the stop button on the tiny panel. You get a notification stating that the game clip was captured.
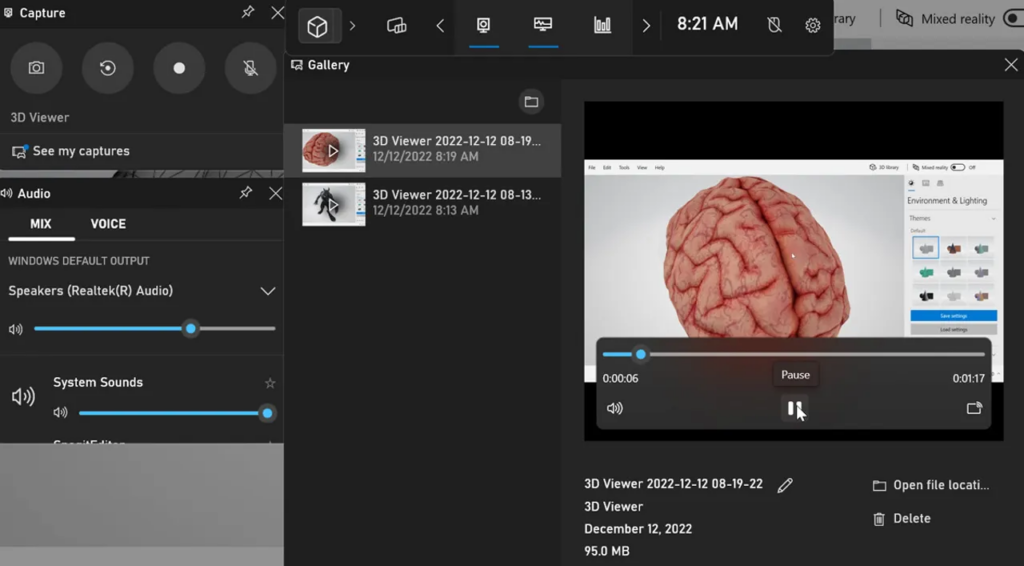
To go back to the Game Bar interface, either click that message or hit the Windows key + G. A Gallery window opens, displaying the video that may be played back along with the recording’s name, date, and time. In the viewer, tap the Play button.
From there you can pause the video and raise or lower the volume.
How to record without launching Game Bar
First, press Windows key+Alt+R. The small recording panel appears on the screen. Click the stop button when finished and then open Game Bar. Your new recording now appears in the Gallery window for you to play. If you need to capture the last 30 seconds of screen activity, press Windows key+ Alt+G.
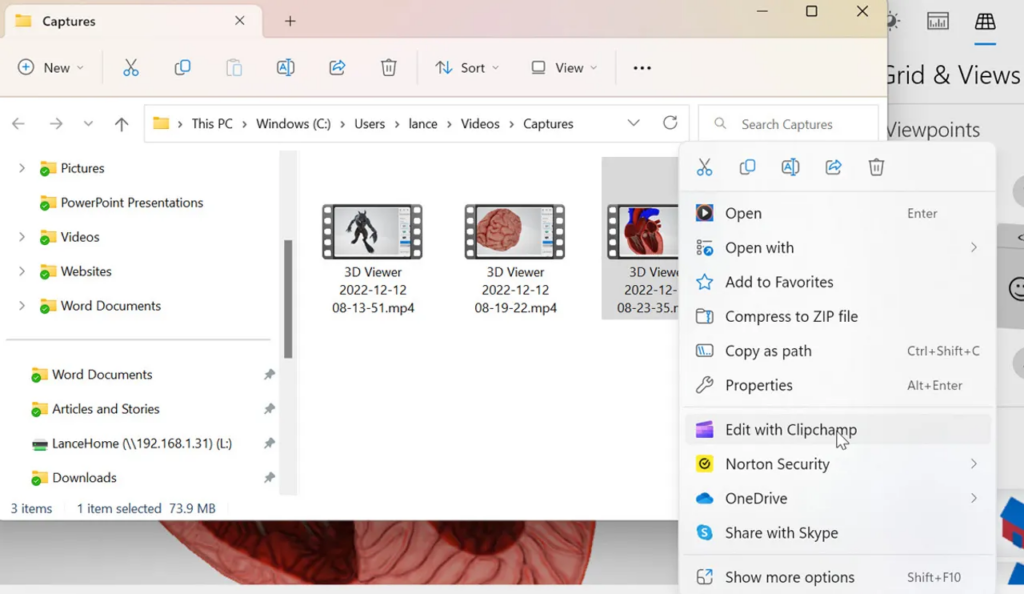
How to work with recorded video directly
Navigate to [username]\C:\users\Videos\Captures. Your videos will be stored as MP4 files, which you may play or edit in a video editor or another program.
How to tweak Game Bar settings
Press Windows key+G. On the top toolbar, click the Settings icon. Here, you can view and change any of the shortcut keys, modify the visual theme of the Game Bar interface and the transparency of the menus and panes, and control how and when audio is recording as you capture your screen activity.
How to record your screen in Windows 11 with the Snipping Tool
Check your OS version
To record your screen in Windows 11 with the Snipping Tool, you’ll need a certain build for the OS. To check, go to Settings > System > About. In the Windows specifications section, the build should be 22621.1344 or higher.
If you qualify, you’re good to go. If not, head to Windows Update to snag the latest updates for the OS and then to the Microsoft Store and your library to grab the latest updates for your Store apps.
Set up the window or app you want to record
Click the Start button, go to All Apps, and then click the shortcut for Snipping Tool. Click the Camera icon on the toolbar and then select the New button.

Focus on the right area
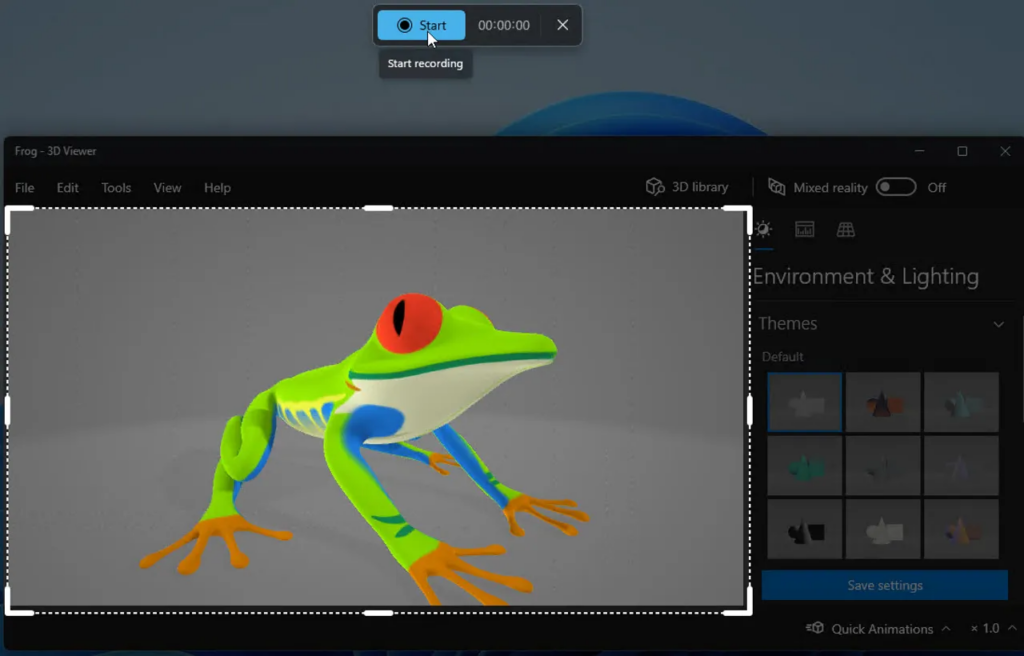
Select the area you want to record and then click Start on the Snipping Tool toolbar.
Perform the activity
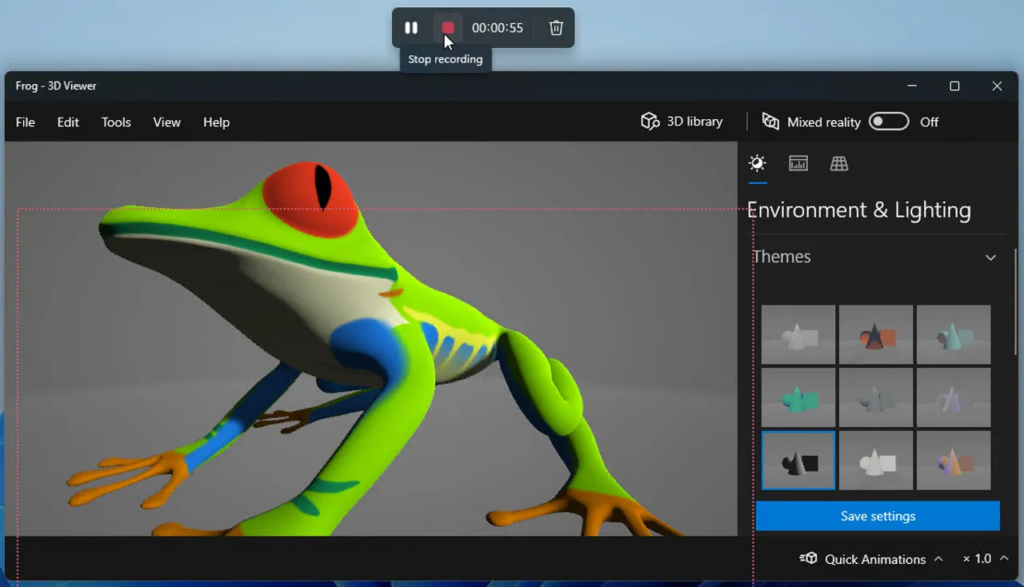
After the recording starts, perform the screen activity you want to capture. Click the Pause button on the toolbar to take a break and then click the Record button to restart. When done, click the Stop button.
Share or save the file
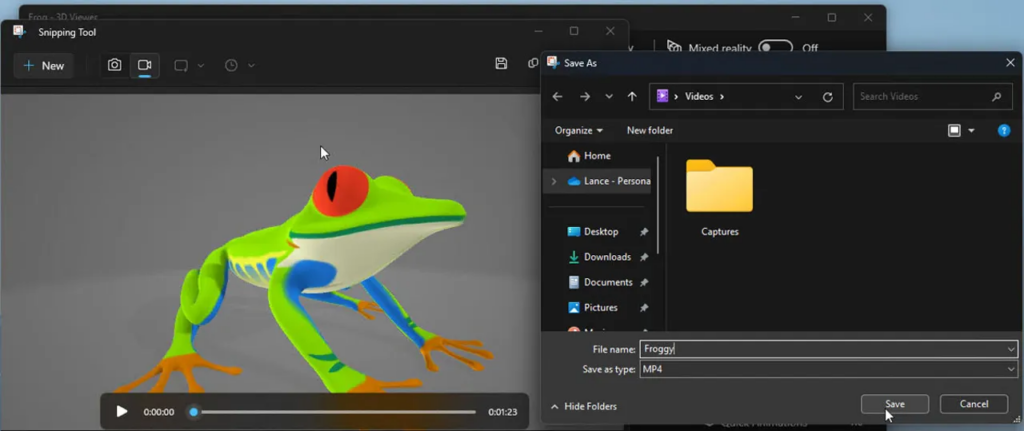
The recording automatically starts playing in a Snipping Tool preview window. From there, click the Share icon to share the file with a person or app. Click the Save button to save the recording as an MP4 video file.
Set your preferred audio recording source
With the latest update to the Snipping Tool, you can now configure your audio settings before you start your screen recording. To do this in the Snipping Tool, click the ellipsis icon in the upper right and select Settings. Scroll down the screen to the section for Screen recording.
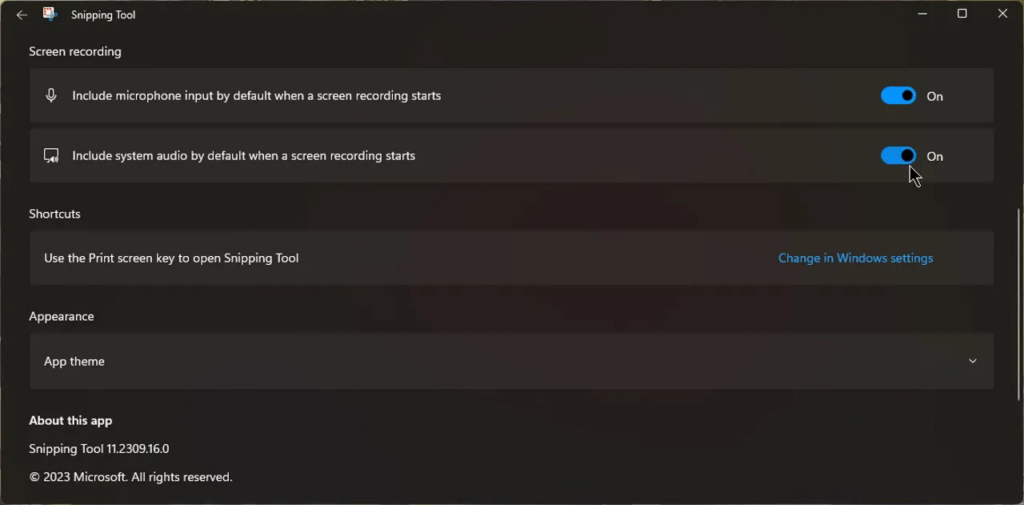
To automatically start recording audio through your microphone, turn on the switch for Include microphone input by default when a screen recording starts. To automatically start recording your PC’s system audio, turn on the switch for Include system audio by default when a screen recording starts.
During the actual screen recording, you can also opt to mute the audio from the microphone or from the system.
How to make a professional-quality recording on Windows 10 & 11 with Camtasia
While Snagit is perfect for creating short and informal videos, there’s really nothing better than Camtasia for creating professional-quality videos. Not only does it have hundreds of easy-to-use, drag-and-drop editing features to give your screen recordings a polished feel, but it also comes with a free trial.
While many screen recordings don’t need to be overly complex, sometimes you might want to add annotations, closed captions, effects, and animations to your videos.
But don’t worry, despite its advanced functionality, Camtasia is just as easy to use as Snagit — and we’ll prove it! In this section, we’ll walk you through the steps of recording your screen on Windows 10 with Camtasia.
Choose your recording options
First, open Camtasia and click the Record button.

This will open the Camtasia recorder, which is the control center for your video and audio recordings.
From here, the Camtasia recorder allows you to fully customize the controls for your recordings.

Select the region you want to record
Similarly to Snagit, start off by selecting the part of your screen that you want to record.
While there may be times you need to record your entire screen, if the purpose of your video is to demonstrate how to use software or where to click on a website, it’s probably better to record a single window — or even just part of one.

Just as with Snagit, Camtasia will let you choose to record your whole screen or a specific part of it. You can choose from one of the pre-determined regions or choose “select an area to record” to select a custom region.
Pro tip: If you do plan on recording your entire desktop, it might be worth tidying it up a little to ensure there is nothing distracting or unwanted in your video.
Record your audio
If you’re narrating your recording, then we suggest writing a script, or at least some talking points. Having a script in place is a good way to ensure you cover all the most important points without veering off-topic.

For now, however, just choose which microphone you want to record from and decide whether you want to record your computer’s system audio.
Then, when you’re ready to stop the recording, click the recorder icon in the taskbar. We told you it was easy!
Produce and share
Finally, once you’ve perfected your video it’s time to share it with the world. Whether you’ve recorded a webinar or an entire lecture, there are loads of platforms you can use to host your video.
Depending on your audience an online platform like YouTube or Vimeo could be the perfect place to host your video. If, however, you’d rather share it with a select group of people then TechSmith’s Screencast might be a better option. Alternatively, you might not want to share it online at all, in which case you can save it on your PC as a video file.

And that’s all there is to it! Whether you want to use the built-in tools, like Game Bar, or third-party software such as TechSmith’s Snagit and Camtasia, you now know how to screen record on Windows, with audio.
Screen recordings are a great way to produce clear communications for your audience. This could mean you no longer have to schedule Zoom calls to walk a coworker through a process or have countless meetings to explain simple tasks. From now on, you can just send them a screen recording!
Conclusion: Unleash Your Creativity with Screen Recording
By the time you finish this article, you should have the information and abilities necessary to record your screen on Windows 10 and Windows 11 with confidence and ease, including audio integration. The ability to record and share your screen is a valuable tool for anyone trying to improve their communication, be they an educator, content creator, or business professional.
Accept the realm of screen capture, and unleash your imagination to create lifelike digital experiences. The canvas is provided by Windows 10 and 11, now it’s up to you to create the artwork for your digital narrative.
Thank you For Choosing Us, Explore More Of Our APK Modes !